

Key takeaways
- Check the total for each retailer. The cheapest listing for one part may have extra shipping or a different return policy.
- Look for stock status. A low price on a part that is out of stock is not a deal you can use.
- Compare against price history. A listing that looks like a sale may simply be the usual price.
- Do not chase the lowest total at the cost of compatibility. A mismatched part that must be returned erases any saving.
To use PCPartPicker, open its System Builder, add one part per category (CPU first, then motherboard, memory, storage, graphics card, case, power supply and cooler), read every compatibility message the tool shows, check the wattage estimate, and then save or share the list through its permalink. The site is a free planning tool: it filters out many incompatible parts and compares retailer listings, but it does not replace reading the specification sheets. This pcpartpicker guide walks through each step, explains what the warnings mean, and lists what the tool cannot check.
Our top picks

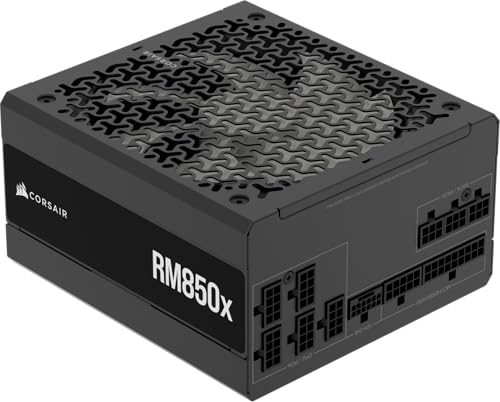

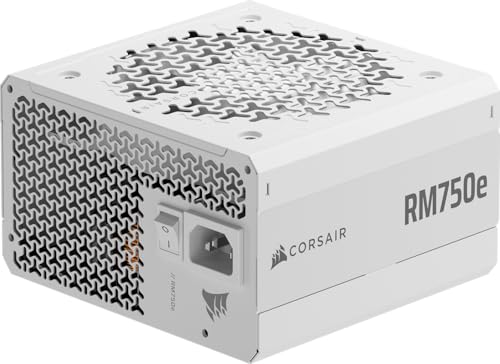
As an Amazon Associate we earn from qualifying purchases at no extra cost to you.
Quick answer
| Step | Action | What to look for |
|---|---|---|
| 1 | Open the System Builder and set your region | Retailer list and currency follow the region |
| 2 | Add the CPU first | Socket decides the motherboard and RAM type |
| 3 | Add motherboard, memory and storage | Socket, RAM type and M.2 / SATA conflicts |
| 4 | Add GPU and case | GPU length and case clearance, form factor |
| 5 | Add the cooler and power supply last | Cooler height, socket mounting, wattage estimate |
| 6 | Read the compatibility box under the list | Warnings versus errors, and the disclaimer text |
| 7 | Save, share and set price alerts | Permalink, list history, alert thresholds |
| 8 | Verify the physical fit by hand | Manufacturer manuals for what the tool cannot check |
What PCPartPicker is and what it does
PCPartPicker is a parts-list and price-comparison website. According to the site’s own About page and descriptions in guides such as the MakeUseOf and Technibble write-ups, it combines four things: a catalogue of PC parts with specifications, a compatibility checker that flags known conflicts between selected parts, an estimated wattage figure, and listings from retailers with price history and alerts. It also hosts completed builds from other users and build guides written by its own team.
It is important to see what the tool is not. It does not sell parts itself, it does not guarantee that a list will work, and it cannot know about things that are not in its database. Treat it as a very fast first filter, then confirm the important numbers against manufacturer pages.
Step-by-step: building a list
Step 1: choose the CPU first
Start with the processor because it sets the socket, and the socket sets almost everything else. AMD’s current desktop platform uses the AM5 socket with DDR5 memory, and Intel’s current desktop platforms use LGA1851 (Core Ultra 200S) and the older LGA1700 (12th to 14th Gen). By choosing the CPU first, the compatibility filter can narrow the motherboard list to boards with the matching socket. PCPartPicker keeps the compatibility filter switched on by default, and CGDirector’s guide to the warnings recommends leaving it on.
Step 2: pick the motherboard and memory
When you add a motherboard, check three things on the list page: chipset, form factor (ATX, micro-ATX or Mini-ITX) and the number of M.2 slots. Then add memory. PCPartPicker will tell you if the module type does not match the board, such as DDR4 modules on a DDR5 board. It will not tell you whether a particular kit appears on the board maker’s qualified vendor list, which is something only the board manual covers.
Step 3: add storage and watch for lane sharing
Add your SSD and any additional drives. Many boards share lanes between an M.2 slot and certain SATA ports, so using the M.2 slot can disable one or two SATA ports. Build-guide sites that audit the tool’s accuracy note that this kind of lane sharing is not flagged. The board manual has a table that lists exactly which ports are disabled.
Step 4: add the graphics card and the case
Choose the GPU and then the case. The tool uses GPU length and the case’s maximum GPU length from manufacturer specifications. If a case or card is missing the relevant measurement in the database, no warning appears, which is easy to mistake for a pass. Always compare the two numbers yourself and leave at least a few millimetres of margin. If your list uses a small case, our Mini-ITX advice applies: published limits include only the part and not the cables or fan frames next to it.
Step 5: add the cooler and the power supply
Add the CPU cooler and then the power supply last. The reason for adding the power supply last is practical: PCPartPicker shows an estimated wattage for your list, and the supply choice depends on it. If the supply is too small for the estimate, a warning appears. Cooler socket compatibility is checked, but as CGDirector points out, matching the socket is not always the same as matching the mounting hardware. Some AM4 coolers, for example, do not fit AM5 boards when they use their own backplate hardware.
How to read the compatibility box
Under the list, PCPartPicker shows a compatibility section. It has a few distinct message types, and the difference between them matters.
| Message type | Typical meaning | What you should do |
|---|---|---|
| Incompatible (red) | A clear conflict, such as a socket mismatch or wrong RAM type | Change one of the parts before going further |
| Warning (yellow) | Possible issue, such as a BIOS update being required or a connector being short | Read the message, then check the manufacturer’s page |
| Note / disclaimer | Generic text that some dimensions cannot be checked | Check cooler and RAM clearance by hand |
| No message | No known conflict in the database | Not a guarantee. Still verify key numbers |
The BIOS update warning
One warning that confuses beginners says that a motherboard may need a BIOS update to support the selected CPU. This does not mean the pair is incompatible. It means the board may ship with older firmware that does not recognise newer processors. The fix options are to check the board maker’s CPU support list for the minimum BIOS version, choose a board that supports the CPU out of the box, or pick a board with a BIOS flashback button, which lets you update from a USB stick without a CPU installed. Per the CGDirector guide, PCPartPicker does not track exact BIOS versions for every CPU and board combination, so the maker’s list is the final word.
The physical clearance disclaimer
You will often see text saying that some physical dimension restrictions cannot be automatically checked, such as cooler and RAM clearance with tall heat spreaders. Forum replies indicate this notice appears when no case is in the list, since clearance cannot be judged without one. After adding a case, you still need to confirm that the cooler height is under the case limit and that RAM modules do not collide with the cooler fan, especially in a compact case.
The wattage estimate: how to use it properly
PCPartPicker shows an estimated wattage for the selected parts. It is a reasonable lower bound, not a recommendation. Here is a worked example of turning it into a buying decision.
- Suppose the estimate reads 480 W for a mid-range gaming list.
- Add headroom for transient power spikes and for future upgrades. A common rule of thumb is to pick a unit rated for about 1.5 times the estimate, which gives 720 W. A PCPartPicker forum thread shows users disagreeing on the exact multiplier, and some argue the rule was written for older, less efficient hardware.
- Round to the next common supply size, which here would be 750 W.
- Check that the supply has the right connectors: the number of PCIe 8-pin cables, or a native 16-pin (12V-2×6) cable if the GPU needs one.
- Check the supply’s form factor: ATX for a standard case, SFX or SFX-L for most small cases.
High-end GPUs change the maths. NVIDIA lists the RTX 4090 at 450 W with an 850 W recommended supply, and the RTX 5090 at 575 W with a 1000 W recommended supply, so a list with one of these cards should be sized to the maker’s recommendation rather than the bare estimate.
PSU wattage tiers at a glance
| Build class | Estimated list wattage | Sensible supply size | Notes |
|---|---|---|---|
| Entry 1080p gaming | 250 to 350 W | 450 to 550 W | One or two 8-pin PCIe cables |
| Mid 1440p gaming | 350 to 500 W | 650 to 750 W | Check GPU connector type |
| High-end 4K gaming | 550 to 750 W | 850 to 1000 W | Native 12V-2×6 cable preferred |
| Flagship GPU build | 750 W or more | 1000 W or more | Follow the GPU maker’s recommendation |
Prices, retailers and alerts
For each part, PCPartPicker lists retailers and their current offers. It can also show price history so you can see whether a part is cheaper than usual. The price alert tool emails you when a retailer’s price drops below a threshold you set for a specific part, and parametric alerts do the same for a whole product category with custom filters, according to descriptions of the service. Because prices and stock change quickly, this article does not quote any, and you should treat a price on the list page as a snapshot.
Practical tips for using price data:
- Check the total for each retailer. The cheapest listing for one part may have extra shipping or a different return policy.
- Look for stock status. A low price on a part that is out of stock is not a deal you can use.
- Compare against price history. A listing that looks like a sale may simply be the usual price.
- Do not chase the lowest total at the cost of compatibility. A mismatched part that must be returned erases any saving.
Saving, sharing and getting feedback
When your list is complete, use Save as to store it under your saved lists. Each saved list gets a permalink, a short URL ending in a code, that you can post on forums or send to a friend. The site can also generate formatted text for forum posts, and lists have a history view that shows recent changes, which helps if you swap a part and forget the old one. To edit a list from a completed build, open its full price breakdown and choose the option to edit the part list, then save it as your own.
Before asking others for feedback, add your use case in the post: target resolution, games, monitor refresh rate and budget. A list without context gets generic replies. When you receive suggestions, change one part at a time and watch which warnings appear or disappear.
What PCPartPicker cannot check
| Item | Why the tool misses it | How to check it yourself |
|---|---|---|
| Fan header count | Board fan header counts are not listed in the database, per CGDirector | Board manual; count headers against fans, AIO pump and RGB hubs |
| M.2 / SATA lane sharing | Not modelled | Board manual table |
| RAM qualified vendor list | Not modelled | Board maker’s memory support list |
| VRM strength for a given CPU | Not modelled | Independent board reviews and the CPU support list |
| Exact BIOS version needed | Not tracked for every combination | Board maker’s CPU support list |
| Cooler and RAM clearance | Some dimensions cannot yet be checked | Cooler height versus case limit; RAM height versus cooler fan |
| Cable lengths and routing | Outside its scope | Case manual; PSU cable list |
| Real-world noise and thermals | Not a performance tool | Independent reviews |
Common mistakes and fixes
- Turning the compatibility filter off. It hides parts the tool knows are incompatible. Keep it on unless you have a reason.
- Treating a clean list as a verified build. No warnings only means no known conflicts in its database. Verify the clearances.
- Buying the exact wattage shown. Add headroom and check connector types.
- Ignoring the BIOS warning. Check the minimum BIOS version for your CPU, or choose a board with flashback.
- Choosing a cooler by socket only. Check the mounting kit, especially when reusing a cooler from an older platform.
- Not reading the retailer details. Compare return policies and shipping, not only the headline price.
- Forgetting the operating system and peripherals. They are not always part of the list but are part of the real cost.
Safety and troubleshooting after the parts arrive
A good list is only the start. When assembling, ground yourself by touching bare metal on the case, use the standoffs that match the board’s form factor, and do not force any connector. If the PC fails to start, run through a basic no-POST checklist: reseat the memory until both clips click, confirm the 8-pin CPU power cable is plugged into the board’s CPU power socket, confirm the 24-pin connector is seated, and plug the monitor into the graphics card rather than the motherboard. If a build refuses to boot after a CPU upgrade, return to the BIOS warning above and verify the BIOS version.
Is PCPartPicker enough on its own?
For choosing parts, comparing prices and sharing a list, yes: it is the most convenient tool for the job. For confirming that a specific build will fit and run quietly, it is one input among several. Pair it with the case maker’s clearance numbers, the board manual and independent reviews, and you will catch the problems the tool cannot see.
How we compared
We compared manufacturer manuals, specifications and independent guides named below. We did not build or benchmark these systems ourselves.
Sources
- PCPartPicker, About page and System Builder documentation
- CGDirector, PCPartPicker Compatibility Warnings Explained
- PCPartPicker forums, threads on wattage estimates and compatibility messages
- MakeUseOf, PC Part Picker guide for first-time builders
- Technibble, PCPartPicker overview
- NVIDIA, GeForce RTX 4090 and RTX 5090 power requirements as reported by Micro Center, Corsair and Tom’s Hardware
- Motherboard manufacturer manuals and CPU support lists
Frequently Asked Questions
Is PCPartPicker free to use?
Yes, building and saving lists is free. The site earns money from retailer links, so it can offer price comparison without charging users.
Does PCPartPicker guarantee that my parts will work together?
No. It flags many known conflicts, but it cannot check everything, such as fan header counts, memory qualified lists or some physical clearances. Verify the important numbers with the manufacturer.
How accurate is the wattage estimate?
It is a useful lower bound. Choose a supply above the estimate, typically with a margin of about half again, and follow the graphics card maker’s recommendation for high-power cards.
What does the BIOS update warning mean?
It means the motherboard may ship with firmware that does not yet support the CPU. Check the board maker’s CPU support list and choose a board with BIOS flashback if you cannot update with a spare CPU.
Can I share my list with someone?
Yes. Save the list and copy its permalink, or use the generated text for forum posts. Anyone with the link can view the parts, and a list can be copied and edited as a new one.
Should I rely on PCPartPicker prices?
Use them as a guide. Prices and stock change quickly, so confirm the final price, shipping and return policy on the retailer’s page before buying.
Do I need to add the case and cooler to the list?
Yes, because several clearance checks depend on them. Without a case, the tool cannot judge GPU length or cooler fit and will show a generic disclaimer.
Write Your Review
No reviews yet. Be the first to share your experience!